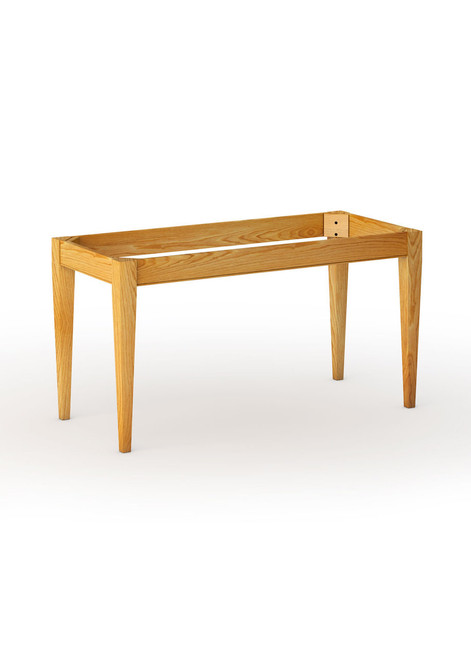
Dining Table Base Kits + Desk Base Kits
-
Enjoy TableLegs.com's exclusive EasyBase™ system: Assemble your custom dining table base kit in minutes rather than hours – no glue or clamps needed. Traditional mortise and tenon also available. Easily attach your table top with pre-drilled pocket holes
-
Custom made to your specifications: You choose the legs and apron width and length (up to 48” x 120”), overhang, wood type and edge details. Get your own unique dining table base design.
-
Create your own unique design: Made just for you by our small team of Vermont craftsmen in genuine natural solid woods like White Oak, Mahogany, Cherry, Maple, Red Oak or Walnut
-
Finished or unfinished table bases: Either way you order, you'll get an heirloom-grade product made with love and fine attention to detail. Each custom base is a unique work of art.
Our custom dining table base kits make excellent DIY projects for wood and metal desk bases and dining room tables. High quality materials like solid wood and stainless steel make these turned leg bases incredibly strong.
Our exclusive EasyBase™ system allows you to build a custom size table in just minutes instead of hours. All hardware is included, and no glue or clamps required. This system has been featured in Ask This Old House with Jimmy Diresta and Modern Builds.
We make it easy to create your own unique heirloom quality dining table base and add a table top. Order your base square or rectangular in any custom size. We can finish it for you, or you can get an unfinished dining table base. These bases are also sold with tops as dining tables.
DIYers love our wood and metal dining room table bases. Quickly customize, assemble and finish in the comfort of your own home. Professionals find that our speed and unparalleled quality allows them to focus on what really matters - making their clients happy.
Our traditional and modern dining table bases come in a variety of styles. Shop contemporary dining table bases, industrial dining table bases, farmhouse table bases and more. They are very strong, and most can be used as dining table bases for a granite top or heavy wood or stone slab. If in doubt, don't hesitate to contact our customer service.
Choose from several genuine solid wood types like Maple, Cherry, White Oak, Walnut or Red Oak. Mahogany may also be available, please call us at 1-800-748-3480 to check for availability. Our top notch customer service and high quality standards make us the trusted source for dining table legs and bases online.
How to assemble an EasyBase™ Desk / Dining Table Base:
-
Position the table aprons upside down on the floor.
-
Align the corner blocks.
-
Attach the table legs to the table base with one supplied tool - a T-wrench.
That's it! Turn your table right side up and admire your new heirloom quality table base - less than 10 minutes start to finish.
What is the dining height for a table base?
The height of a dining table base is 28” - 29”. Your table top will add another ¾” to 1.75” of height depending on your choice of table top thickness.
How wide should the base of my dining table be?
Your dining table should be a minimum width of 23” for one diner to sit comfortably on an end. To fit 2 people on each end, increase that to a minimum of 48” wide. With a 3” table top overhang on all sides, the base of your dining table should then be at least 17” or 42” wide, respectively.
How can I attach my dining table top to the base?
To attach a dining table top to the base simply follow this process:
- Flip the table top upside down on a clean, carpeted or blanketed surface.
- Flip the assembled table base upside down and place it onto the top.
- Center the table base on the top, so the overhang is even on all sides.
- Gently drive in the mounting screws one at a time, alternating sides to ensure proper alignment.
- Flip the completed table over and enjoy your creation.
Tip: Ensure the mounting screws are sufficiently short as to not pierce the top!


